* the biggest rule changes:
Wednesday, June 29, 2011
40k 6th ed rumors
Wednesday, May 18, 2011
Complex Flesh Tones
Human skin tones are one of those things that painters often have trouble with. As with eyes or other aspects of humans, we spend so much time staring at them that we’ve become experts without knowing it. When we see it simplified, we know.
Human skin tones are very complex. Just go have a look at yourself in a mirror and see if you can unlock the subtle game of many different colors that play out on your skin. Regardless of what colors are playing out on your skin, I guarantee that it is complex.
One way that I’ve found to capture the complexity of skin is done in the shading. It is very easy to fall into the habit of only using one color to shade your mini, but instead of that, try taking several colors that can be mixed into your shade color and using them individually instead.
For example with Marneus Calgar here, I took a pink flesh tone (P3 Midlund Flesh) and wanted to shade them using a medium brown (something like P3 Idrian Flesh). Rather than doing that, I found two contrasting paints that can be mixed together to make a medium brown color (in this case: P3 Skorne Red and Battledress Green).
To create the subtle interaction we’re looking for, you’ll want to add three layers of shading to the mini, rather than one flesh wash. Start out by mixing your base color with the brighter of the two colors (in this case, the Skorne Red) and thinning it down with water until it becomes a wash. Apply that to the flesh first, allow it to dry, then do the same thing with the second color. You’ll find that the two colors mostly cancel one another out, and give you a pretty interesting shading coat for your mini.
The next step is to mix the two shading color together for your last layer of shading. Again, get these to wash consistency, but this time take a fine brush and deliberately pick out the areas for the deepest shadows. Wrinkles in the skin are great, the area around the eyes and things like that are wonderful to pick out this way.
After that, reclaim some of the raised surfaces with your base color, then start highlighting up (you can mix base colors with white or use lighter flesh tones).
From there, you’ll want to add details on the face. I’ve covered detailing male faces and female faces in other posts.
One interesting advantage that this method gives you is that you can use exactly the same paints on two different minis and still have slightly different flesh tones (people of the same race will have subtle differences in their flesh tones). For example, this giant was painted using exactly the same colors as Marneus Calgar, but on him the red is a little less prominent:
You can start to branch out a little after you have the basic skin down. This Fairy was shaded using a magenta color rather than a normal red- it gives her a very subtly cooler flesh tone.
Similarly, this Satyr used these techniques, but the shading was done with a much brighter green:
Of course, there’s no reason that this kind of shading would have to stop at human flesh tones:
Tuesday, May 3, 2011
Iron Daemon Prince
Friday, April 29, 2011
Smartmax is taking pre-orders for The Thirteenth Hour
Ok, maybe I wasn't keeping up, but I didn't even know that Smartmax was interested in making games to go with their miniatures. They've been making such absolutely fantastic Victorian Horror minis that I just missed it entirely.
One of the strangest things is that their whole line of miniatures is at 1/35 scale- approximately 54mm. Really, I haven't seen anyone try to make a game using larger scale minis since Games Workshop gave up on Inquisitor.
Still, if you're interested in painting some outstanding minis at that scale, they have them.
If you're interested, they're taking orders on their game. They've called it the Thirteenth Hour, and at least the mood on their website is very strong. It will be a small scale skirmish game (which is good, because there was no way anyone was going to field a force of fifty 1/35 minis).
Of course, you might not need to have an interest in the game to want to paint some of those beauties.
Tuesday, April 26, 2011
Dreadnought in Silvers
Tuesday, April 12, 2011
Get your self some Crawling Chaos
I think I might call it "the Crawling Chaos of Everblight." It might be that I'm in the middle of playing Cthulhu Saves the World, but there just seems to be something Lovecraftian about it, don't you think?
For comparison, take a look at this Nyarlathotep statue:
I could see more Lovecraftian styled Everblight.
As of right now, I understand that Privateer Press' policy is still to release one book every year, and this year it is a Warmachine book. It is possible that we'll get to see this in its full resin glory before 2012, but I'm not counting the days just yet.
Tuesday, April 5, 2011
More Hazard Stripes
Tuesday, March 22, 2011
Basic Techniques for beginner painters
Over the years, I've taught a number of people to paint starting from scratch. It is always fun to watch someone learn a technique and be able to make their minis pop with it. And the truth is, the basic techniques are very simple, and almost everything else a painter does stems from one of those techniques.
Here is an overview of the basic techniques. This is a brief version of a lesson that I would give to any new painter as I walk them through their first mini.
- Priming - You need to cover the mini with a spray primer. The thing to remember here is that you want a very thin layer of primer on your mini- you don't want to cover up those fine details. One trick you can use is to spray the mini in short bursts, moving the spray can back and forth.
Black primed minis tend to be more forgiving, so I'd start there if I were you, but there are advantages to white primer.
- Base coating - after your prime your mini, you need to paint each area in a solid color. Painting within the lines is really the key here. I normally completely finish one area before basecoating another, but many people prefer to basecoat the entire mini before doing anything else with the colors.
- Shading with washes - If you take any acrylic paints or ink (P3 included) and add some water to it, you'll get a translucent paint we call a wash. Apply a wash made from a darker color than your base coat and you'll find it naturally flows into the cracks. For a more advanced version, try applying a wash directly to the shade areas.
- Highlighting by layering - The next thing to do is to layer up with your color. Take a lighter version of base color (often made by mixing the paint with a lighter color) and apply paint directly to the raised areas on the mini. This will give your mini an added sense of depth.
- Note on colors - You can most easily accomplish the steps above by getting three versions of the same color (like a dark red, lighter red, and lightest red). When you feel confident, you'll find it is fun to mix it up (I love taking a green, shading it with red and highlighting it with a pale blue, and red often can be nicely shaded in brown). You can mix your highlight colors using anything lighter than your base color, really. For many colors, I use bone white as my mix up color (it is very light, and gives every color a sort of warm feel).
- Note on metallic paints - Metallics work exactly the same as other colors, except for one thing. They don't mix well with other paints. You can shade a metallic metal with another paint, and it will work fine, but when you are highlighting, make sure that you only use metallic paints.
Thursday, March 17, 2011
Reaper does Savage Worlds
Reaper miniatures has had a lot of news lately. Their latest grand announcement is that they'll be producing miniatures for the Deadlands RPG setting.
If you don't know Pinnacle Entertainment's award winning setting or the Savage Worlds game system, you might want to check it out. A mix of gothic fantasy and old west, Deadlands really has a lot to offer. And honestly, the world needs more undead gunslinger minis.
Of course, here we just might be more concerned about the minis, and Bob Ridolfi has produced some nice ones:
Monday, March 14, 2011
Here come the pigs!
Ok, so the Farrow minis from Privateer Press have been available for a while, but up until now, very few had been painted by me. Well, I recently finished a commission where I got to paint a whole horde of crazy pigs, and I'm ready to share them with you.
Of course, the greatest of all pig minis is definitely the new Frankenstein's creation: the Warhog.
Thursday, March 10, 2011
Reaper Releases Lunch Boxes!
Ok, maybe they aren't just lunch boxes, but now if you buy any reaper box set, they'll come in their very own egg-crate filled carrying case .
Basically, they're gun cases with pretty pictures of minis on the front. But you've got to admit, they make pretty good lunch boxes. I mean, when I was in elementary school, these would have been pretty sweet:
Of course, most Reaper box sets are for large multi-piece minis rather than for sets of minis, and once you've assembled your dragon, there's no way you'll be transporting him in the lunch pale anymore.
But then again, who ever bought a Reaper multi-piece dragon and doesn't have enough minis to fill a little case like this?
Monday, February 21, 2011
More Cake Toppers and Zombies!
Those of you who have been following me for a while will know that I offer a service to create custom wedding cake toppers. And they’re always some of the best projects around.
Here are some photos of the latest zombie fighters. These two are on some desperate ground right now, and I’m afraid they’ll be overrun soon.
And for the couple that wanted the bride to be the zombie, here is a set of dancers. You know it’s love when you’re tied together by spider webs.
Anyone whose new to the site can see some of my other zombie creations over on the Geek Wedding Cake Toppers page.
Thursday, February 10, 2011
Worn Leather
I often get compliments on the ways that I paint worn brown leather. It is actually a fairly easy process.
First, you need some way of getting a dark and fairly neutral brown base coat or shading coat. Normally, I either paint a neutral brown color on, then shade it with a brown ink, or just start out with a very dark brown. If you start out with a neutral brown with ink, then you should apply your highlight layers with a little water in them to help the lower colors show through more. If you started out with the dark brown, you should mix the dark brown into your highlight layers in order to create a smooth transition.
The next step is to highlight using a very red brown (like P3 Bloodstone or Citadel Vermin Brown). This is going to be a very prominent color, so go ahead and cover up most of the layers underneath (you just want those layers for shading).
You will now have a very red looking brown color. The next step is the trick to making your leathers look worn. Highlight using a very yellowy brown color (like Citadel’s Snakebite Leather or P3 Rucksack Tan). Keep your blending good as you highlight up and you’ll be able to maintain the illusion well.
In the end, you’ll have a brown color that is more red in the shadows and more yellow in the highlights. This gives the impression that the leather has been out in the sun and is worn.
As always, I have some finished examples:
You can also experiment with these kinds of colors on non-leather surfaces, like the brown scales on this dragon:
Wednesday, February 2, 2011
Instant Mold
I found this out from Coolminiornot. They've just started selling stuff they're calling Instant Mold.
Apparently, this stuff is sculpable like green stuff, but it become maleable when warmed, and hardens when cooled.
The potential for this stuff was immediately obvious. You can't sculpt with it, but you can make press molds with it, and create some pretty impressive stuff.
I'm looking forward to trying it out, probably using some of Scibor's techniques in creating a press mold.
Tuesday, January 25, 2011
Studio McVey has a gutsy range of miniatures
Honestly, looking through the Studio McVey line, you’ll find all sorts of minis that are meant for painting and nothing else. Mike and Ali McVey know what great miniatures are, and they get some of the best sculptors in the industry to make some of the most creative miniatures you’ll ever see.
The latest addition to their range is Ruby. I suppose that she could be used as a PC for anyone playingBroncosaurus Rex (or another setting inspired by Valley of the Gwangi). But there really just will never be a lot of call for a cowgirl riding a dinosaur.
Even if you’ll never use it, this mini is fantastic. The composition, attention to detail and even the setting details (like the armor plates) are just perfect.
Have a look for yourself. And stop wondering why Studio McVey took three first places for the Table Tog Gaming News Editor’s choice best mini of 2010.
Thursday, January 20, 2011
Armorcast Warhound Titan
I recently got a pretty outstanding commission to paint up a Warhound Titan made by Armorcast. Armorcast did official Games Workshop miniatures before Forgeworld took over their position. This particular mini had a copyright 1989 stamped onto him.
The titan is a fine miniature, but it had some issues with detail- it was basically an enlarged epic scale mini- and it came from an era in which miniatures in general were a little less loaded with detail. So he needed something to bring him up to date.
But with all of those broad areas, I just had to add in some freehand, right?
Wednesday, January 19, 2011
Space Hulk Brood Lord
I’ve had my own Space Hulk set for over a year now. Like all painters, I have way too many projects in the works.
So here is the first of the Genestealers, the Brood Lord. The others are already started, and are going to match him. I was going for a more neutral color pallet than the one that the studio painters used (I played a little bit of Gears of War and based the colors off of one version of wretches).
Anyway, here he is:
Thursday, January 6, 2011
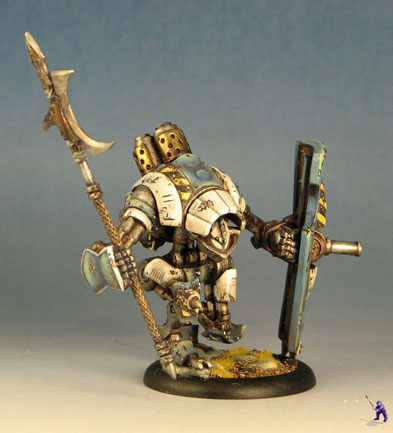
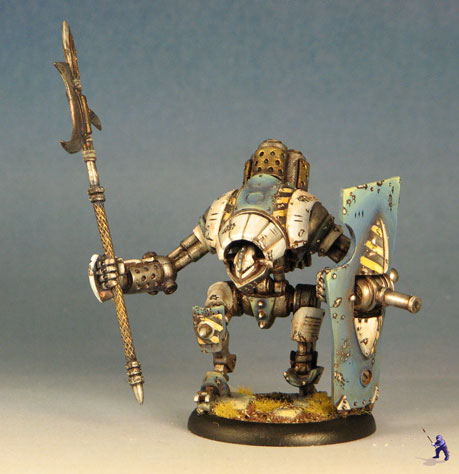
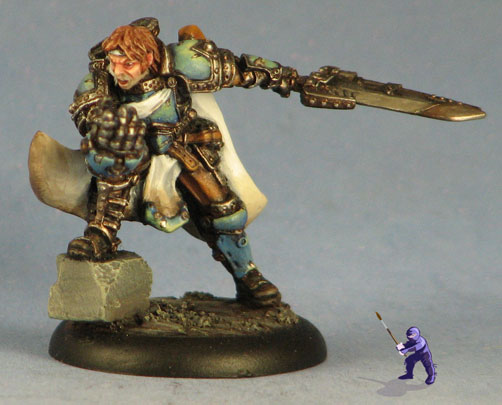
Magnus in Hazard Stripes
I've been working on a Magnus the Traitor battlegroup for a little while now, and it has been going pretty well. This project started when I just wanted to paint up a random Nomad that I had, and then continued through a Mangler for one of No Quarter Magazine's monthly competitions.
After I finished the Epic version of Magnus for the P3 painting competition, and almost everything else in for the battlegroup, I eventually got around to painting the non-epic form.
One of the main reasons I didn't use this version of Magnus for the competition is his pose. His pose is huddled close to his sword- far less dramatic than the epic form. To combat this, I gave him a far busier paint job than the epic form had.
The biggest difference is the hazard striping on his shoulderpads. Those go a long way to break the mini up and create a sense of movement in the composition. For the same reason, I tried to emphasize his flowing cloak by adding in the dirt effects at the bottom.
Anyway, here he is:
Wednesday, January 5, 2011
Warmachine Battle Engines
This week, Privateer Press announced that they'll be previewing a new kind of model for Warmachine: the Battle Engine.
So far, the only thing we know about these new minis that we haven't seen before is their size: they are huge! Normally Warmachine miniatures have a maximum base size of 50mm, but these monstrosities will be totting massive 120mm bases. Just have a look at this comparison picture:
And they're made from resin. This isn't the first of Privateer Press' resin miniatures- the Extreme Titan Gladiator was a resin kit (and a very large one at that). But the titan is really a collector's piece- more like their older Denegra statue.
Now, it remains to be seen just how a 120mm based miniature will affect the game. I'm personally a little skeptical that ginormous battle engines will be adding all that much to a very fine game, but Privateer Press have surprised me before with great results for ideas that seemed like they wouldn't work. So let's wait and see how they turn out.
Oh, and they're posting a new piece of concept art for a battle engine every day this week. Head on over to the Privateer Insider Blog to see what they're cooking up next.Monday, December 20, 2010
Max the Wild
I was recently commissioned to create a Malifaux mini to look like a popular children’s book character.
This sculpt will be replacing The Dreamer (a small child who is lord of the monsters of Malifaux). Once again, I have to give credit where credit is due, and this outstanding idea originated with my client.
I tried to take the very cartoonish style of a children’s picture book and convert it into the detailed and over the top style of a Malifaux miniature.
Here are the results: